
VERSIONE IN INGLESE IN FONDO (ENGLISH VERSION AT THE BOTTOM)
Secondo l’autrice della ricetta dalla quale ho preso spunto, questo è il vero e tradizionale New York Cheesecake, e prevede cottura (a me, nonostante le elucubrazioni dei puristi della “crusca” piace declinare al maschile il nome di questo splendido dolce anglofono!).
Le è stato suggerito da un’amica di New York, e io – visto il successo che riscuote ogni volta che lo preparo – ve lo ripropongo!
Il primo che provammo fu in casa di amici a Chicago. Ottimo!
Tutta la famiglia si innamorò di quel dolce, e vi assicuro che questo cheesecake non ha nulla da invidiare a quello offerto dai nostri amici negli Stati Uniti!
Qui trovate anche una versione in barattolino, senza cottura e senza uova, da preparare e gustare in un baleno!
Premetto che il dolce deve passare almeno una notte in frigorifero dopo la cottura; solo così infatti si sentirà la famosa “texture”.
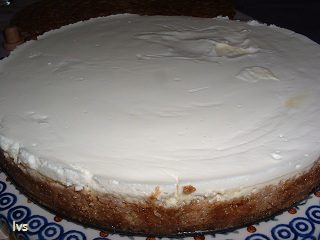
Inoltre lo strato superiore di panna non si dovrebbe quasi notare, si dovrebbe compattare invece perfettamente con lo strato inferiore.
E’ per questo che la cosa migliore sarebbe far riposare il cheesecake addirittura 24 ore in frigorifero (ma non credo di essere mai arrivata ad aspettare tanto!).
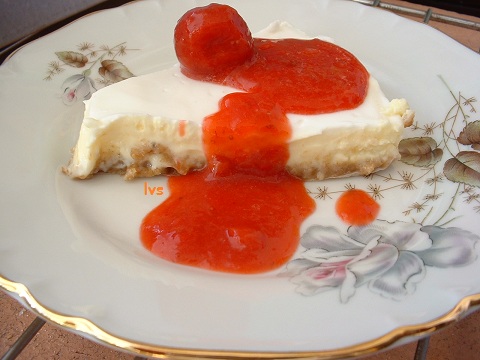
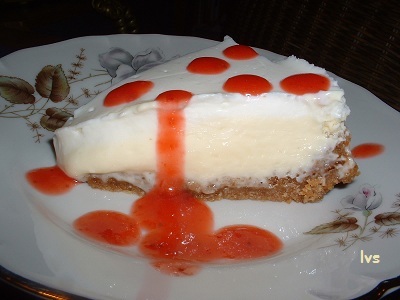
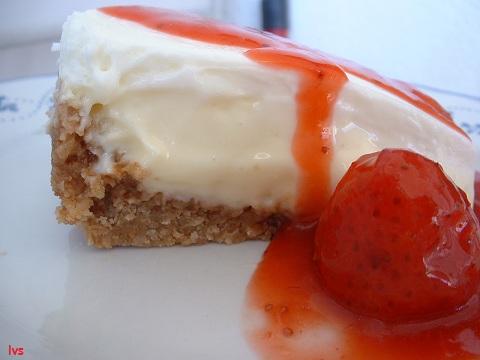
La salsa di fragole per accompagnare il dolce è un optional, ma anche se può essere sostituita con altro, la ritengo la soluzione migliore!
E passiamo agli ingredienti delle 3 fasi salienti del cheesecake:
800 grammi di formaggio spalmabile (ho utilizzato a volte il philadelphia tipo Yo al 13% di grassi, ma anche altri tipi di formaggio, e anche senza lattosio)
180 gr uova intere (3 uova grandi)
265 grammi di zucchero
40 gr di succo di limone (3 cucchiai)
220 gr biscotti tipo Grancereale (mie sostituzioni ai più tradizionali Graham Crackers o Digestive Mc Vities, ma vanno bene anche i Grancereale Digestive, o Galbusera Turco Digestive, o i frollini integrali Bio Conad, e in generale qualsiasi biscotto di proprio gradimento che riesca a sbriciolarsi e ricompattarsi col burro)
70 gr zucchero (3 cucchiai colmi)
105 grammi di burro sciolto dolcemente e poi raffreddato
370 gr panna acida (o sour cream o crème fraîche: è un ingrediente che troviamo in molti altri piatti sia salati che dolci. Io l’ho realizzata anche lactose-free)
70 gr zucchero (3 cucchiai colmi)
1 cucchiaio di estratto di vaniglia (o un cucchiaino di vaniglia naturale in polvere, ma si vedranno i puntini)
Procedimento
Prepariamo prima la massa 2.
Ho tritato a intermittenza, non troppo finemente, i biscotti nel mixer e ho aggiunto burro fuso, zucchero e cannella.


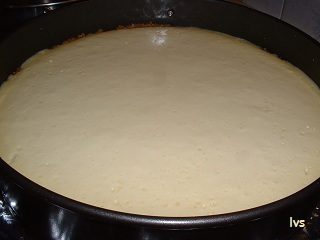
Una volta cotto il dolce lo lascio riposare per 30 minuti in forno spento prima di aggiungere il composto della massa 3.
ENGLISH VERSION
According to the author of the recipe from which I took inspiration, this is the real and traditional New York Cheesecake (I also like to decline this beautiful cake to the masculine!). It was suggested her by a friend of New York, and I – given the success that collects every time I prepare it – I propose it to you , increasing the doses for a cake tin of at least 26-28 cm in diameter!
The first one we tried was at a friend’s house in Chicago. Great!
The whole family fell in love with that spoon dessert, and I assure you that this cheesecake has nothing to envy to that offered by our friends in the United States!
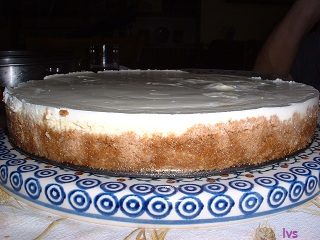
Above, my first cheesecake (delicious even if too low: the doses of the original recipe were not enough for my mold).
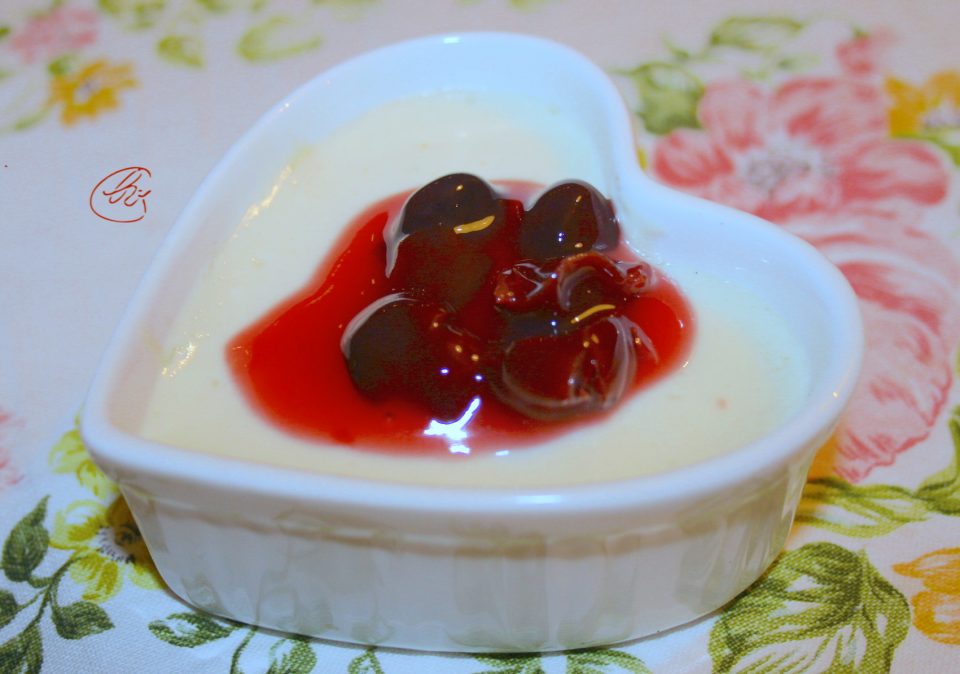
Above a single portion with sour cherry sauce.
I state that the dessert must pass at least one night in the refrigerator; only in this way will the famous “texture” be felt.
In addition, the top layer of cream should almost not be noticed, but should be compacted perfectly with the bottom layer.
That’s why the best thing would be to let the cheesecake rest 24 hours in the fridge!
The strawberry sauce to accompany the dessert is an option, but even if it can be replaced with another, I consider it the best solution!
And let’s move on to the ingredients of the 3 major phases of the cheesecake:
Mass 1
800 grams of Philadelphia (I used the Yo type, 13% fat, but I also made excellent versions with high digestibility, with lactose free spreadable cheeses)
180 g whole eggs (3 large eggs)
265 grams of sugar
40 gr of lemon juice (3 tablespoons)
Mass 2
220 gr Digestive Mc Vities (my substitutions Grancereale type biscuits or Bio Conad wholemeal biscuits)
70 gr sugar (3 tablespoons full)
105 grams of butter melted gently and then cooled
1 pinch of cinnamon powder (optional, I put it)
Mass 3
370 gr sour cream (or panna acida or crème fraîche: is an ingredient that we find in many other dishes both salty and sweet. I have also made it on my own a lactose-free version)
70 gr sugar (3 tablespoons full)
1 tablespoon vanilla extract (or a teaspoon of natural vanilla powder, but you will see the dots)
Method
First prepare the mass 2.
I chopped intermittently, not too finely, the biscuits in the mixer and I added melted butter, sugar and cinnamon.
At this point, it is possible to fit the paper-scapes on the bottom of the opening cake-tin, or line the whole mold, helping the walls with some butter.
These operations are to facilitate us if we have to turn out the cake from the cake-tin, otherwise we will be able to omit it.
I mixed everything and poured into the mold, I pressed the mixture with the back of a soup spoon and raised a little bit the edge of biscuits along the sides of the pan to better contain the creamy mixture.
I moved in the fridge for ½ hour, so as to make the butter firm.
Let’s move on to the preparation of mass 1
I insert all the ingredients at room temperature in the mixer (or in a bowl to work by hand) and mix the time necessary to have a fairly liquid compound (it is normal), without taking too much air.
Gently pour this mixture on the bottom of biscuit pulled out of the fridge
The cake is ready to go in a preheated static oven for about 40-45 minutes at 150 ° C covering from the beginning with an aluminum foil (not in contact, I recommend), as it must remain ivory color, it should not darken too much.
Once cooked the cake let it rest for 30 minutes inside the oven “off” before adding the mixture of mass 3.
Now mix the mass 3, ie 370 grams of sour cream, with sugar and vanilla
I put this mass 3 on the already cooked cake, and spread it well.
Return the oven to a temperature of 150° C static and bake again the cake for another 20 minutes.
Once cooked, get out and let it cool well.
Then I put it at least for the whole night in the fridge (better 24 hours).